This topic contains the options and steps for filling out a form:
Working with Large Files
Note that if you open, scroll-through or use set page number for a very large file, you may see the spinning circle (highlighted in yellow below) displayed in the middle of the Viewing Client while the document loads:
Opening a Form
- From the splash screen, under View an Existing Template section, click on View next to the template you want to fill out:
- The template is displayed in the Viewing Client and the Checklist pane displays:
- The required fields have a red star next to them and the optional fields have a grey circle.
 |
Required Checkboxes will not have a red star next to them on the form, but they will display in the Checklist as required. |
- Starting with the first item in the Checklist, you can press the Tab key to move through the fields on the from. You will need to use the mouse to choose a date, draw a signature, draw initials or select a checkbox.
Working with Signatures
You can create both drawn and typed signatures to use throughout the document. You can also remove them from the document or delete them permanently and start over with new signatures. This section covers these options in detail.
Drawing a New Signature
- Click on the first item in the list. In this example, click on Signature of Examiner. The form focus moves to the Signature field.
- Click in the Signature field and the Draw or Type a New Signature dialog box displays:
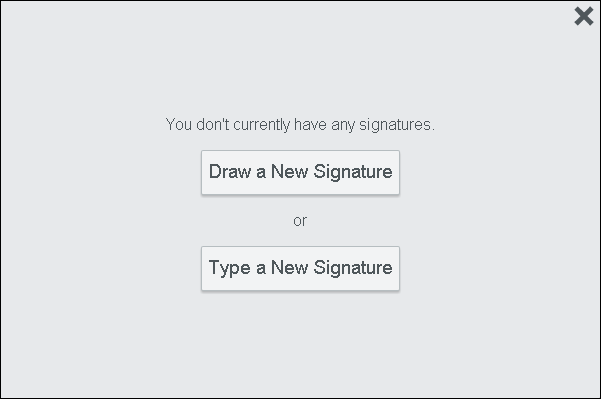
- To draw a new signature, click on Draw a New Signature. The Draw Signature dialog box displays:

- With your mouse, draw your signature above the line. You have the option to Retry, Set as default, Cancel or Save. When you are finished, click Save. Your signature is placed in the Signature field.
Typing a New Signature
- To type a new signature, click on Type a New Signature. The Type a New Signature dialog box displays:
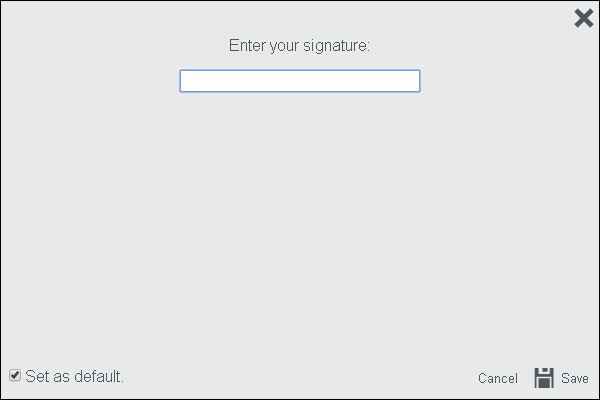
- Type your signature in the Text box. Your signature displays in a variety of fonts:
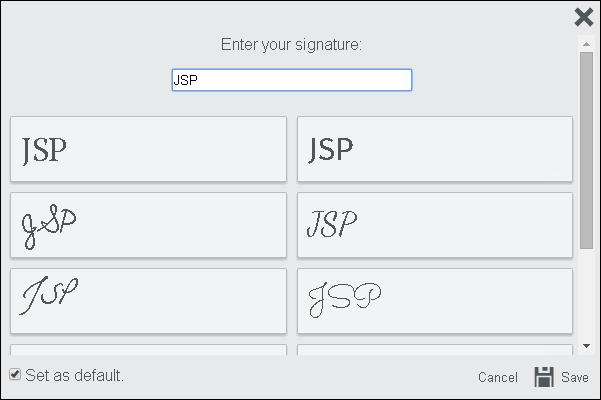
- You have the option to Set as default, Cancel or Save. Click on the signature you want and click Save. Your signature is placed in the Signature field.
Applying a Signature
- To apply a different signature, click in the Signature field. The Signature dialog box displays:
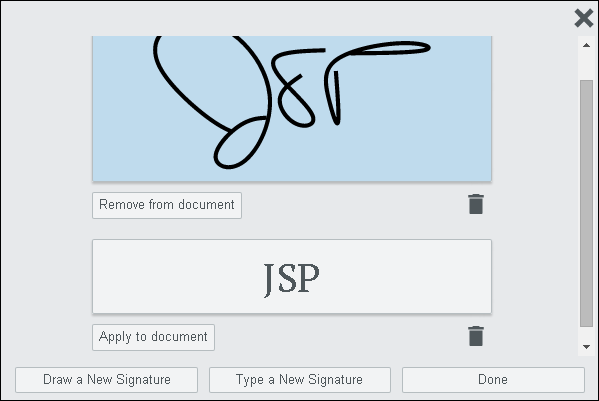
- Scroll to the signature you want to use and click Apply to document.
- Click Done.
Removing a Signature
- To remove a signature from the document, click in the Signature field. The Signature dialog box displays:
- Scroll to the signature you want to remove and click on Remove from document (this removes the signature from the document, but keeps it available to use again if you want).
- Click Done.
Deleting a Signature
- To delete a signature from the document, click on the Signature field. The Signature dialog box displays:
- Click on the Delete (trash can) icon.
- The signature is deleted from the e-signature form completely and is not available for use again.
- Click Done.
Working with Initials
You can create both drawn and typed initials to use throughout the document. You can also remove them from the document or delete them permanently and start over with new initials. This section covers these options in detail.
Drawing New Initials
- Click on the second item in the list. In this example, click on Initials of Reviewer. The form focus moves to the Initials field.
- Click in the Initials field and the Draw or Type New Initials dialog box displays:
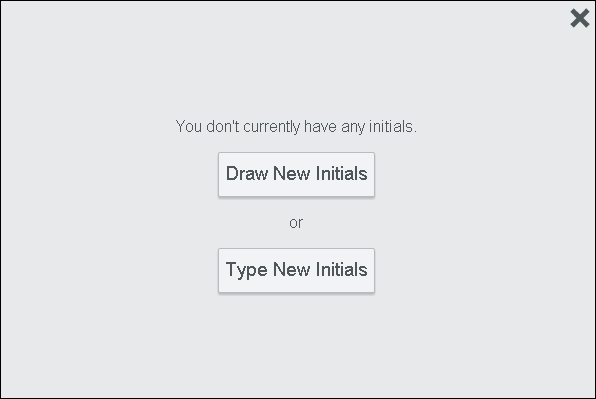
- To draw new initials, click on Draw New Initials. The Draw Initials dialog box displays:
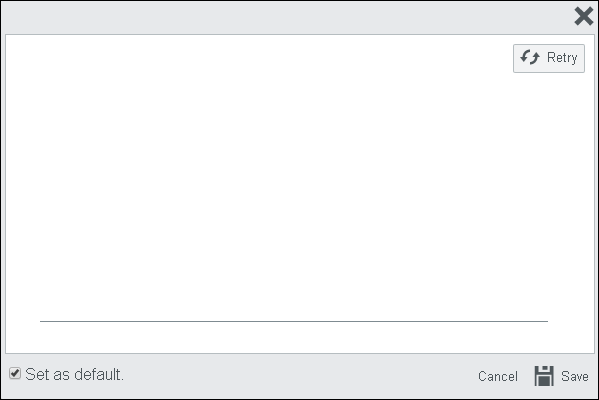
- With your mouse, draw your initials above the line. You have the option to Retry, Set as default, Cancel or Save.
- When you are finished, click Save. Your initials are placed in the Initials field.
Typing New Initials
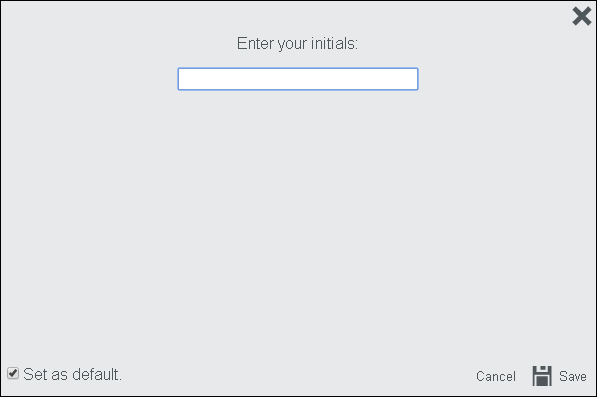
- To type new initials, click on Type New Initials. The Type a New Initials dialog box displays:
- Type your initials in the Text box. Your initials display in a variety of fonts:
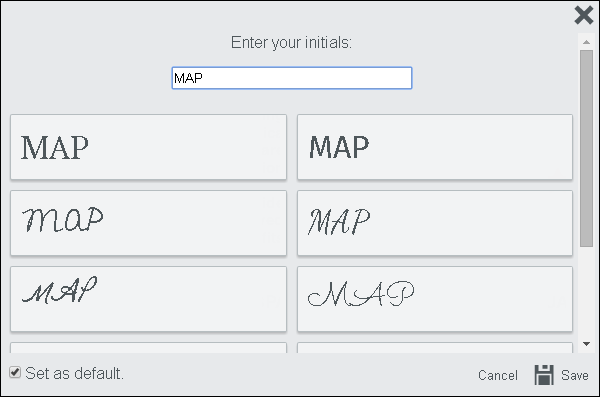
- You have the option to Set as default, Cancel or Save.
- Click on the initials you want and click Save. Your initials are placed in the Initials field.
Applying Initials
- To apply different initials, click in the Initials field. The Initials dialog box displays:
- Scroll to the initials you want to use and click Apply to document.
- Click Done.
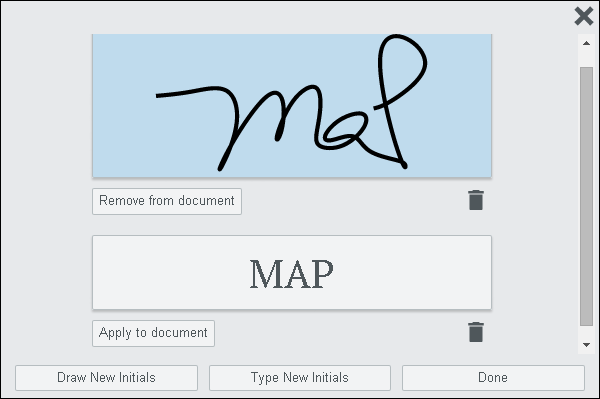
Removing Initials
- To remove initials from the document, click in the Initials field. The Initials dialog box displays:
- Scroll to the initials you want to remove and click on Remove from document (this removes the initials from the document, but keeps them available to use again if you want).
- Click Done.
Deleting Initials
- To delete initials from the document, click on the Initials field. The Initials dialog box displays:
- Click on the Delete (trash can) icon.
- The initials are deleted from the e-signature form completely and are not available for use again.
- Click Done.
Working with Text Boxes
Adding Text
- To add text, click in the Text Box field:
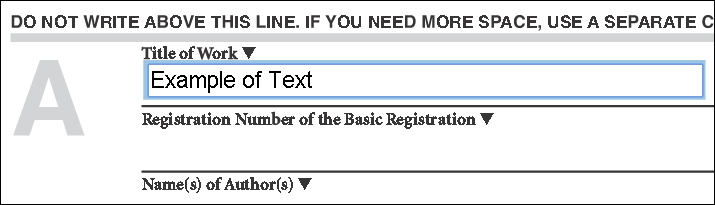
- Type in the required or optional text. Note that if the text box allows multiple lines of text, you will see a scroll-bar appear on the right side of the text box as you are typing:

- Click outside of the text box and go to the next field.
 |
If the box outline turns red, you have exceeded the character limit of the text box:
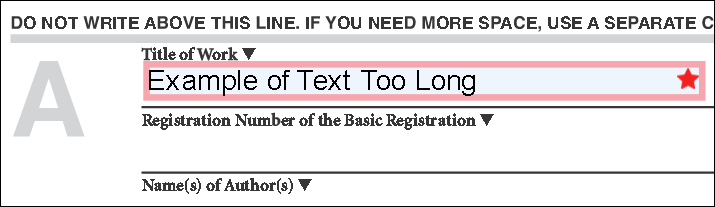
You must edit/delete some of the text within the text box.
|
Working with Dates
Adding Dates
- To add a date, click in the Date field. The date picker displays:
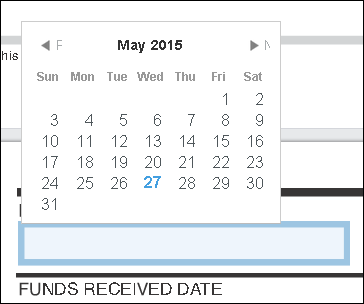
- Click on the date you want and the date is entered into the Date field.
Working with Checkboxes
Selecting Checkboxes
Depending on how the form was designed, you will be able to select either:
- One checkbox out of group
- Several checkboxes in a group
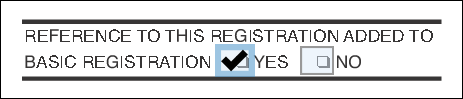
- To select a checkbox, click in the Checkbox. The check mark displays in the checkbox:
|
Required Checkboxes will not have a red star next to them on the form, but they will display in the Checklist as required. |